Hosting my Website on Cloudflare
If you’re not new to my blog, then you may have noticed that my domain changed from reneedesporte.github.io to reneedesporte.com. I’ve also changed the way I host this site: I now utilize Cloudflare instead of GitHub Pages. In this post, I’ll give a high-level look at why and how I migrated my website from GitHub to Cloudflare (and set up a custom domain along the way).
Use of AI
I used ChatGPT throughout much of this process. I think LLMs should be used with caution, as they have an impact on both the environment and the economy.
Motivation
Why would I want to change where/how I host this website? Great question.
As I mentioned in my last post, a big inspirator (I think that’s a word) for the creation of my website has been Nicky Masso, a friend of mine who hosts their site on GitHub Pages. Another is Riley Walz. Walz isn’t someone I know personally (since he’s kind of famous) but I admire his work and website a lot.
So I took a look under the hood… or I had ChatGPT take a look (I’m still new to all this HTML/CSS/JavaScript stuff). I fed in Walz’s home page’s source code and learned that Walz’s site was likely hosted on Cloudflare since “the HTML includes a Cloudflare beacon script at the bottom”.
That was enough for me. Well, that and the fact that GitHub Pages only hosts static sites.
Cloudflare Hosting Options
Cloudflare has (so far as I can tell) just two options for hosting websites: Pages and Workers. Cloudflare Pages is just like GitHub Pages — static sites only — while Cloudflare Workers does both. Since I don’t know what kind of capabilities my site might need in the future, I went with Cloudflare Workers.
Comment
byu/MagedIbrahimDev from discussion
inCloudFlare
Migrating a Jekyll Site from GitHub Pages to Cloudflare Workers
The Before: GitHub Pages
My website is currently a static site, meaning it’s just a collection of files written in HTML, CSS, and JavaScript living on a computer somewhere (a server) and being put on the Internet (hosted). Where do these HTML files come from?
I could write the HTML files myself, but this is tedious. Instead, I use a static site generator called Jekyll to convert files I’ve written in markdown to HTML. I do this locally, first, to see how things look (check out my previous post) before pushing my markdown and Jekyll files to GitHub. Then, GitHub runs Jekyll on their computers to generate the same HTML files before hosting these files on their servers. The whole process looks like this:
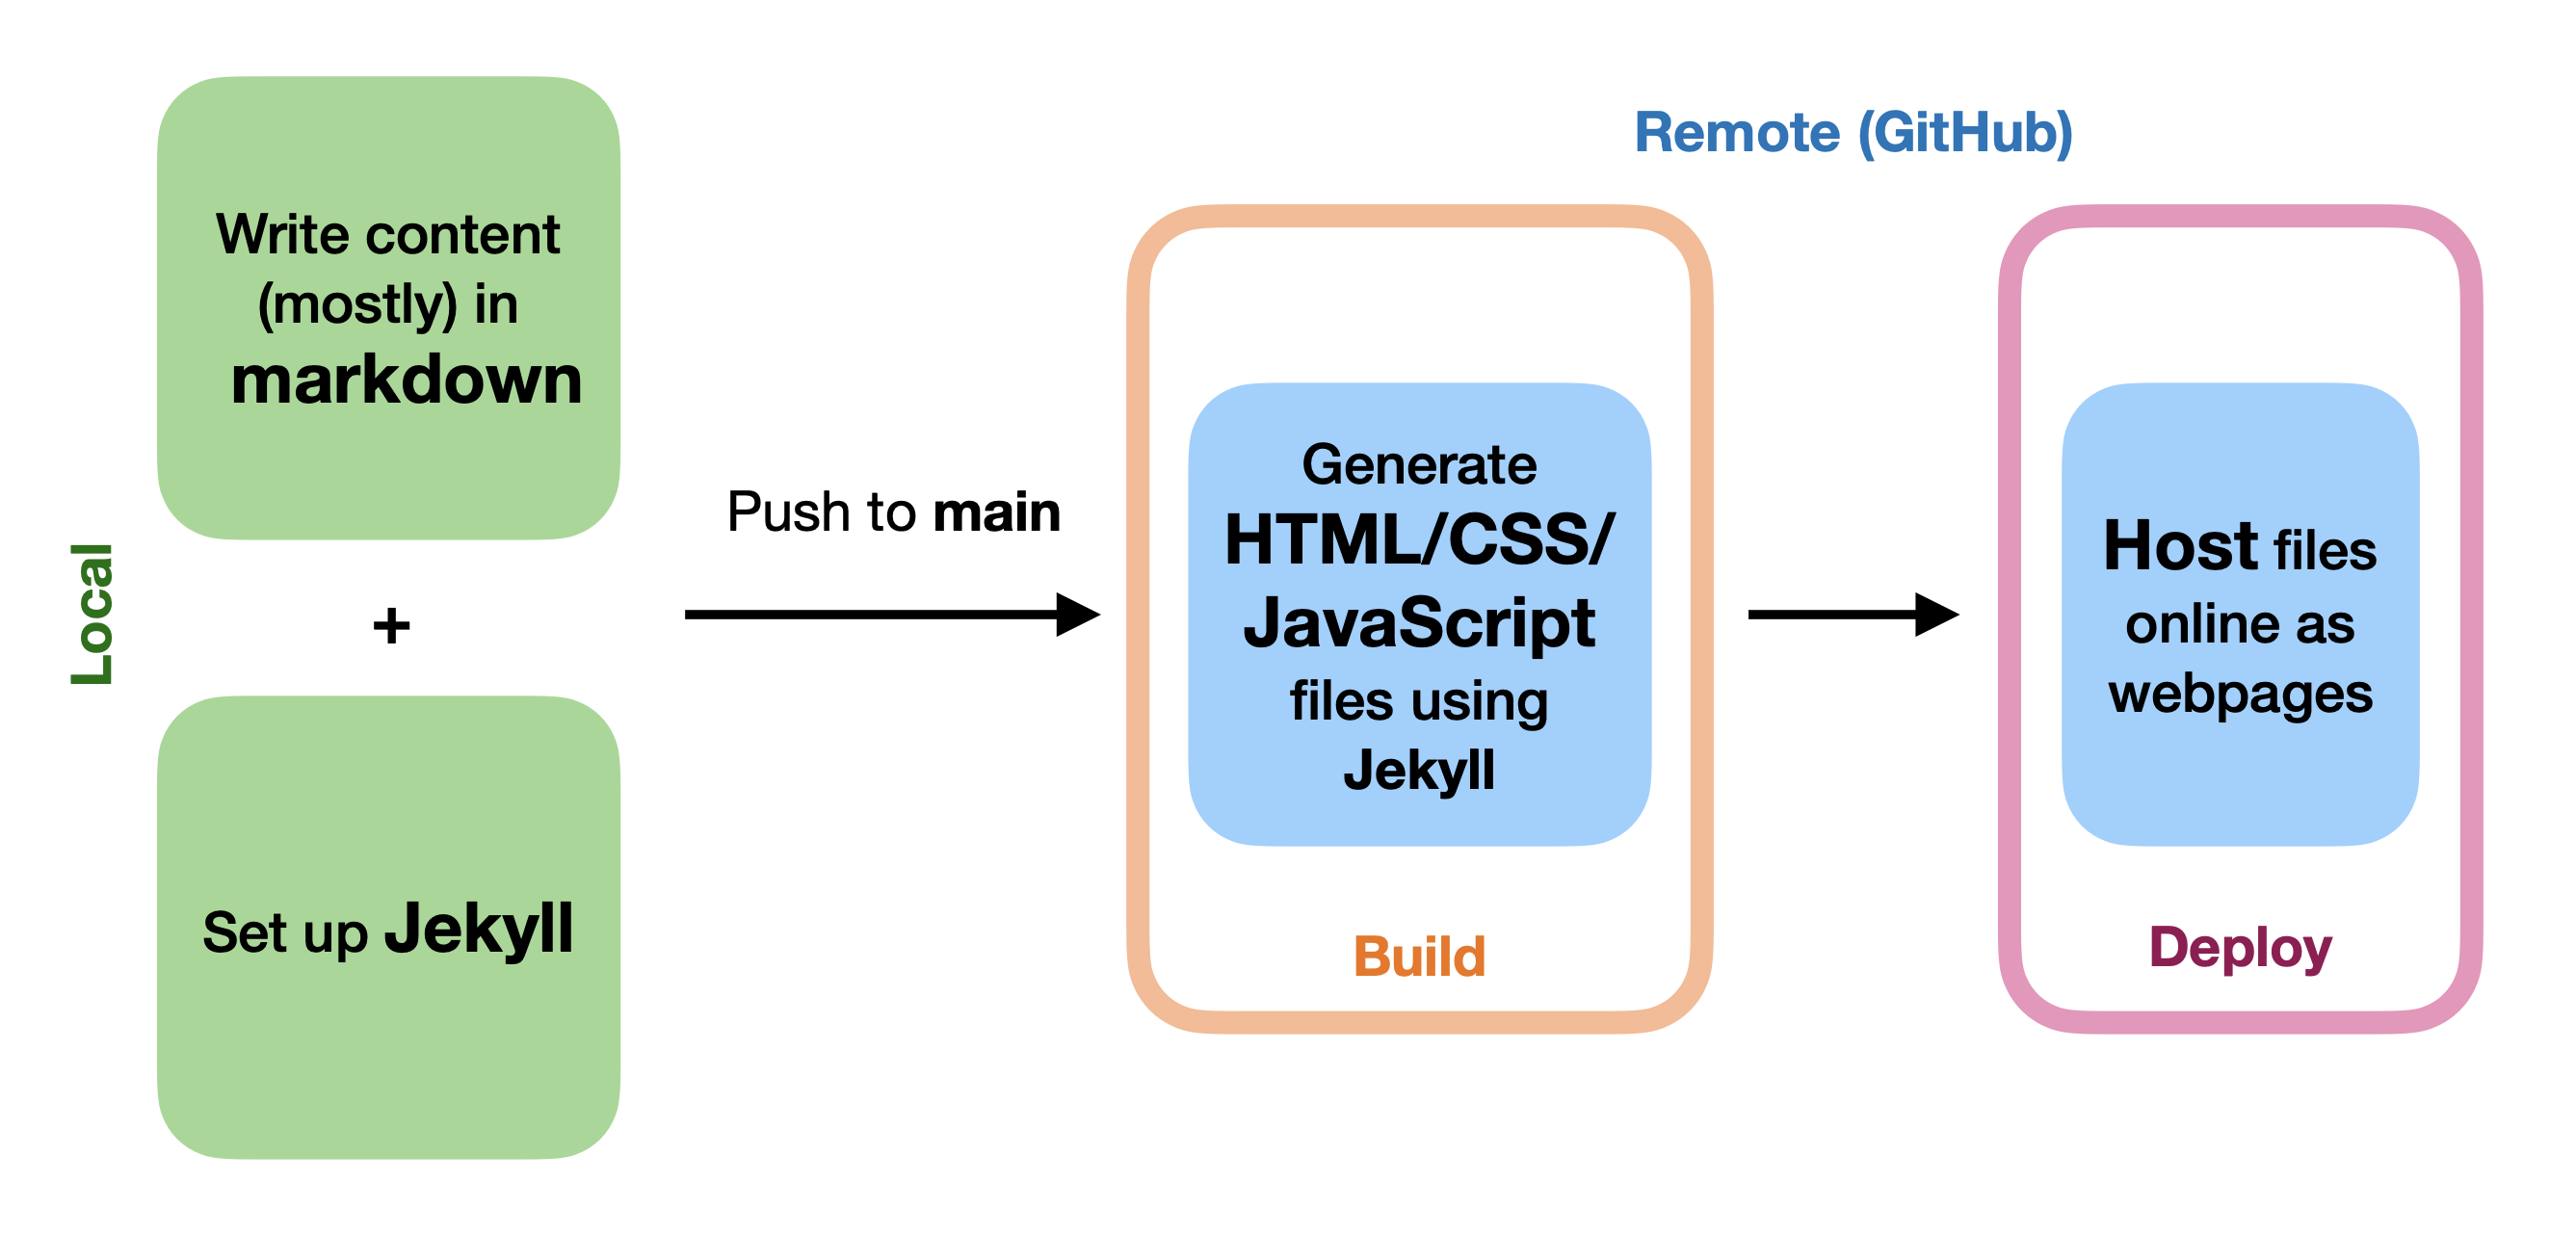
I’ve highlighted the two main steps: build and deploy. GitHub pages does both of these things automatically when you set up a GitHub Pages site using a GitHub Action called pages-build-deployment. This workflow is visible in the “Actions” tab of the repo where a website’s code lives, e.g., here for my website.
The Migration: A New GitHub Action
To migrate my Jekyll-built website from GitHub Pages to Cloudflare with Workers, we’ll need to set up a custom GitHub Action, one that does the build on GitHub and deploys on Cloudflare (since Cloudflare Workers doesn’t support Jekyll builds). I asked ChatGPT to make me a custom workflow for GitHub:
name: Build and Deploy Jekyll to Cloudflare Workers

on:
  push:
    branches: [ main ]  # or your deploy branch
  workflow_dispatch:     # allows manual runs

jobs:
  build_and_deploy:
    runs-on: ubuntu-latest

    steps:
      # 1 Check out the repository
      - name: Checkout code
        uses: actions/checkout@v4

      # 2 Setup Ruby and install Jekyll dependencies
      - name: Setup Ruby
        uses: ruby/setup-ruby@v1
        with:
          ruby-version: '3.2'
          bundler-cache: true

      - name: Install gems
        run: bundle install

      # 3 Cache bundle
      - name: Cache bundle
        uses: actions/cache@v4
        with:
          path: vendor/bundle
          key: $-gems-$
          restore-keys: |
            $-gems-

      # 4 Build Jekyll site
      - name: Build site
        run: bundle exec jekyll build

      # 5 Install Wrangler CLI
      - name: Install Wrangler
        run: npm install -g wrangler

      # 6 Deploy to Cloudflare Workers
      - name: Deploy to Cloudflare
        run: wrangler deploy --domain=reneedesporte.com
        env:
          CLOUDFLARE_API_TOKEN: ${{ secrets.CLOUDFLARE_API_TOKEN }}
For this setup to work, I needed to do 4 things:
- Set up a Cloudflare account.
- Link Cloudflare to my website’s Git repo.
- Create a Cloudflare API token and add it to my GitHub Action’s Secrets (see step 6:
secrets.CLOUDFLARE_API_TOKEN). - Purchase my custom domain
That's it! Since I purchased the domain through Cloudflare, routing my site to the custome domain was as straight-forward as wrangler deploy --domain=reneedesporte.com. I did also add a wrangler.jsonc to my repo, but that might’ve been overkill:
{
    "name": "reneedesporte",
    "compatibility_date": "2025-11-01",
    "assets": {
      "directory": "_site"
    },
    "routes": [
        { "pattern": "reneedesporte.com/*", "zone_name": "reneedesporte.com" },
        {"pattern": "www.reneedesporte.com/*", "zone_name": "reneedesporte.com"}
    ]
}
The After: Redirecting Visitors from my Old Site
I “disabled” (in a sense) my old GitHub website by redirecting visitors to my new site with this script:
<!DOCTYPE html>
<html lang="en">
  <head>
    <meta charset="UTF-8" />
    <meta http-equiv="refresh" content="0; url=https://reneedesporte.com${window.location.pathname}" />
    <link rel="canonical" href="https://reneedesporte.com/" />
    <title>Redirecting to reneedesporte.com...</title>
    <script>
      const dest = "https://reneedesporte.com" + window.location.pathname + window.location.search + window.location.hash;
      window.location.replace(dest);
    </script>
  </head>
  <body>
    <p>
      Redirecting to
      <a href="https://reneedesporte.com/">reneedesporte.com</a>...
    </p>
  </body>
</html>
I put this script by itself in a branch called redirect and set my GitHub publishing source to be that branch. “Set it and forget it”.
Conclusion
This was fairly straightforward to do, and I’m excited about the possibility of making more complex webpages for my site now!